Spark
For other uses, see IgniteBot (disambiguation) .
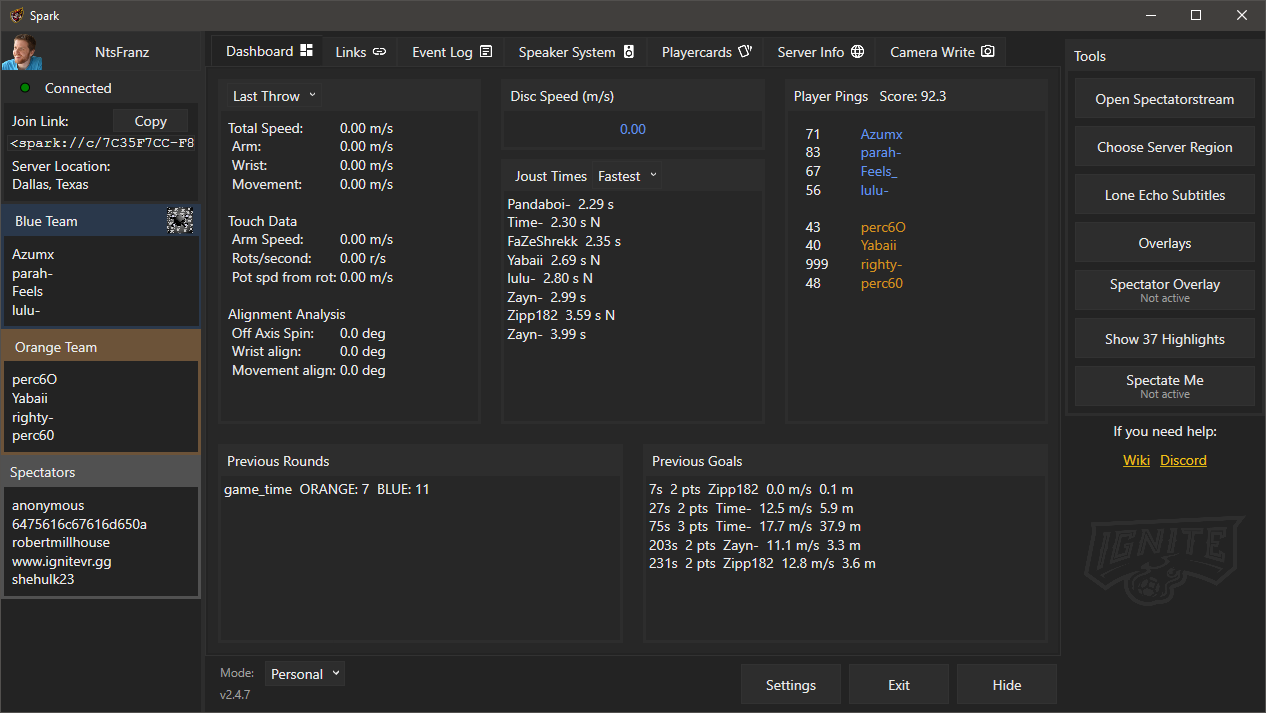
Spark is a Windows desktop program that can record, process, and upload EchoVR data from either a local EchoVR client or an Oculus Quest on the same network. For a full description and list of features, go to https://ignitevr.gg/spark, or join the IgniteVR Discord server. None of your game data is uploaded to Ignite servers unless you choose to.
Installation
Spark supports only Windows computers, but it can be used for both Rift and Quest EchoVR clients.
- Click the Download button on https://ignitevr.gg/spark.
- Click the install button in the Microsoft Store app.
- Once the install finishes, Spark should automatically start, or you can search for "Spark" in the Windows search, and run the program.
If you want to install beta versions, download the latest installer from the GitHub page, and get the beta tester role in the Ignite Discord server to provide feedback.
Setup
Oculus Rift or Quest+Link
- Make sure you have the API enabled in the EchoVR game settings.
- Run Spark and EchoVR at the same time. It does not matter which is launched first.
Oculus Quest
- Make sure you have the API enabled in the EchoVR game settings.
- Your computer and your Oculus Quest have to be on the same network. If they are connected to the same Wi-Fi network, you're good.
- Click the Find Quest IP button while your Quest is fully on (screen on).
- If the automatic button doesn't work, enter the local IP address of your Oculus Quest in the Spark settings manually. You can find your Quest's IP address by clicking on your current Wi-Fi network in the Quest settings.
- Run Spark and EchoVR at the same time. It does not matter which is launched first.
Once you have complete the steps above, you should see data appear in Spark automatically. When in the lobby, only the Server Location will change, but in a match player names and events should start appearing.
Troubleshooting
Spark says Not Connected in the top left corner
- Make sure to enable API in your game settings in VR.
- If you just enabled the API in the game settings and you're on Quest, try rebooting your Quest first.
- Make sure your computer is actually able to read the API data - go to to
http://[QUESTIP]:6721/session, making sure to replace [QUESTIP] with your Quest's actual local IP address, and see if the page loads. For example, the url could look like this: http://192.168.1.128:6721/session. If you're playing on PC, replace [QUESTIP] with 127.0.0.1. If the page doesn't load and you are in a public/private match, the problem is not with Spark, but something about the connection to the Quest's API data is broken. - Verify that you're on the same network as your Quest.
- Some routers disable access to other devices on the network. If you can, try connecting your PC and Quest to a hotspot to test if that's the issue.
- Make sure you're in a public or private match.
- Echo VR's API does not work when you're using Quest Pro controllers. If you're on the Quest Pro headset, you can install Spark Mini directly on the headset.
Unknown error while loading the game
This is an EchoVR bug. There is no single solution to fixing it, but here are some solutions that have worked in the past:
- Make sure the "Use anonymous mode for Spectatorstream/Spectate Me" box is checked.
- Make sure EchoVR is updated
- Make the Oculus desktop app is open when you launch EchoVR
- Go to Settings->Beta->Restart Oculus in the Oculus desktop app
- Reinstall EchoVR on your PC
Find Quest IP fails
- Make sure:
- Your Quest and PC are connected to the same WiFi network
- Your Quest is fully on (screen on)
- You are in a lobby or public/private match
- The Find Quest IP button is just a convenience feature and may not work on every computer. You can always find your Quest's IP address manually and enter it in the box in Spark. On your Quest, click on your current WiFi network, scroll to advanced settings, and find the field labeled Local IP Address. Copy that number in the IP Address field in Spark, and leave the port at 6721.
TTS is not working
- TTS only works with Discord Login, so make sure that's connected first.
- Spark outputs sound to the default Windows audio device, so make sure that's set correctly. This is generally Rift Audio if you're playing PCVR.
- Try clicking the Play Test Sound button. That button will play a sound in the same way as any other event.
- Are the events you're trying to listen to showing up in the Event Log?
- Open the TTS Cache folder with the button and try playing those files. Do those make sound?
My stats aren't showing up on https://metrics.ignitevr.gg/stats
- Even if you have the box checked in the settings window, stats only upload in public matches and when you have Discord Login enabled using the Personal access code.
Reporting Spark crashes
If Spark is crashing, the Event Viewer logs may help to diagnose the issue.
To find the logs:
- Press the Windows button and type 'Event Viewer'
- On the left go to 'Windows Logs->Application'
- Find the errors with '.NET Runtime' or Spark. Recent crashes should be at the top, or you can search for Spark on the right panel.
Main Features
- Server Location
- Estimated location of the current server.
- Live Dashboard
- Contains recent round scores, goals, jousts, and player pings.
- Session ID and Atlas links
- Copy the link to let people join your match directly, or use the Discord invite system.
- Upload to metrics.ignitevr.gg
- Allows you to have complete stat history of your matches.
- Replay recording
- For use with the Replay Viewer.
- Discord Rich Presence
- Shows current match status, time, and score.
- Player pings/serverscore
- Serverscore uses the same algorithm as the VRML discord bot command.
- Text-to-Speech (TTS)
- Customizable callouts for various events in-game.
- "Spectate Me"
- Automatically launches a spectator on your PC to join the public matches you are playing in on your Quest.
Detailed Feature Explanations
Spectate Me
The Spectate Me feature allows you to view your pubs from a spectator perspective automatically.
What you'll need:
- Two devices that can run EchoVR
- Either a Quest and PC, or two PCs.
You can also run the spectator on the same PC that you're playing on, but it is not recommended because of performance.
If you want to use a different program that is focused on the spectator experience, check out Sphinxed's project called Echo Shadow.
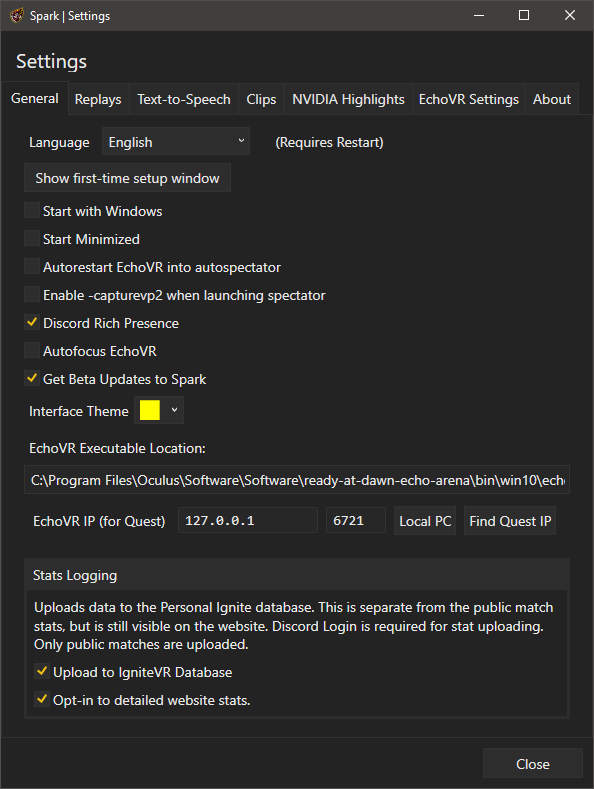
You can customize the camera settings at the bottom of the General tab in the settings window to either follow you, use sideline camera, or follow some other player by name.
As Quest Player:
- Set up Spark for normal Quest usage as detailed above
- Make sure you have EchoVR installed on your PC using the Oculus Desktop app.
- Your PC doesn't have to be VR-capable, but it does need to be reasonably fast to run the game's spectator client at high enough frame rates for recording.
- A button should appear in the right sidebar of Spark called "Spectate Me"
- Once you join a match on your Quest, EchoVR will launch as a spectator in your public match on your PC. If you get kicked out of your match when the spectator joins, make sure to either check the "Use anonymous mode for Spectate Me" in the Spark settings or log into the Oculus desktop app with a separate Oculus account.
As a PCVR Player:
You will need:
- Two PCs capable of running EchoVR on the same network
- Spark installed on both PCs
- API enabled in the game settings on both PCs
- You can use Spark to enable the API setting
Setup
On your playing PC (the one with your headset):
- Launch the game normally and join a private/public match or lobby
- Launch Spark
- The IP Address in Spark should be set to 127.0.0.1 (or click the Local PC button)
On your Spectating PC:
- Open Spark
- Click "Settings"
- Put your playing PC's local IP address in the area for Quest IP.
- Change the port to 6724
- If the playing PC is in a match/lobby and has Spark running, then Spark should say "Connected" at this point.
- Click "Spectate Me"
If all is well, then your spectator will follow you into pubs and privates.
EchoVR Speaker System
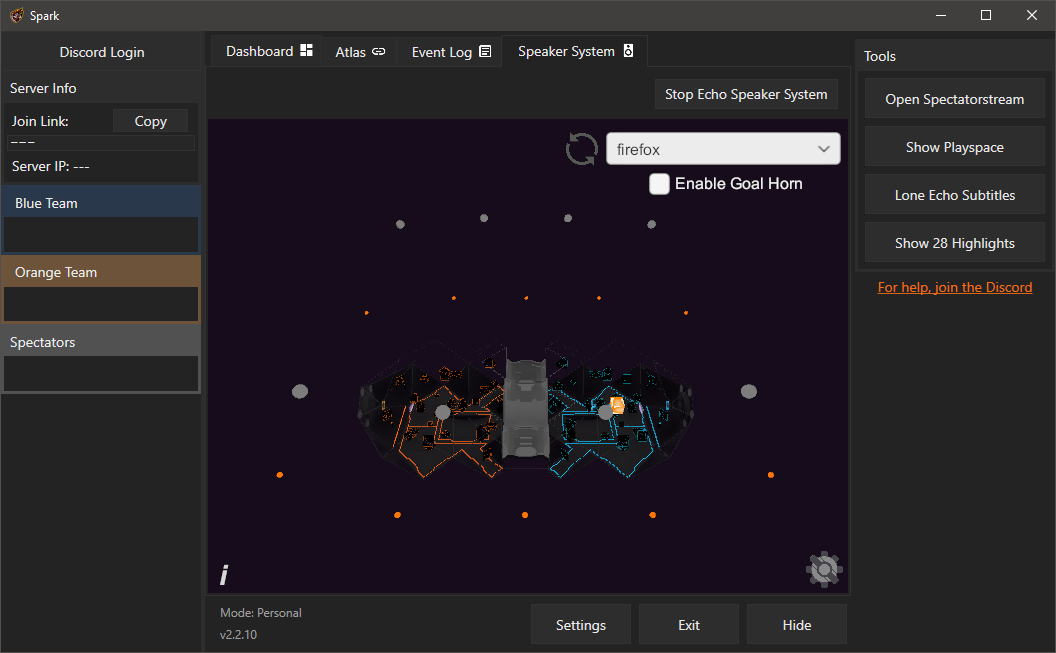
The EchoVR Speaker System (ESS) is a project by iblowatsports that has been embedded into the Spark window. Check out the source here: https://github.com/iblowatsports/Echo-VR-Speaker-System
This is a system to take any audio stream (usually music) and make it sound like it is being played from "speakers" in a stadium outside of the Arena when you are playing. This is positional audio that adds realistic echo/reverberations as well as taking into account the geometry of the Arena itself so that it feels as though you are hearing your music from a stadium surrounding you.
- The Echo Speaker System installer will automatically download and open the installer of Virtual Audio Cable if you do not have it installed
- After installing VAC, make sure to restart your PC
NVIDIA Highlights
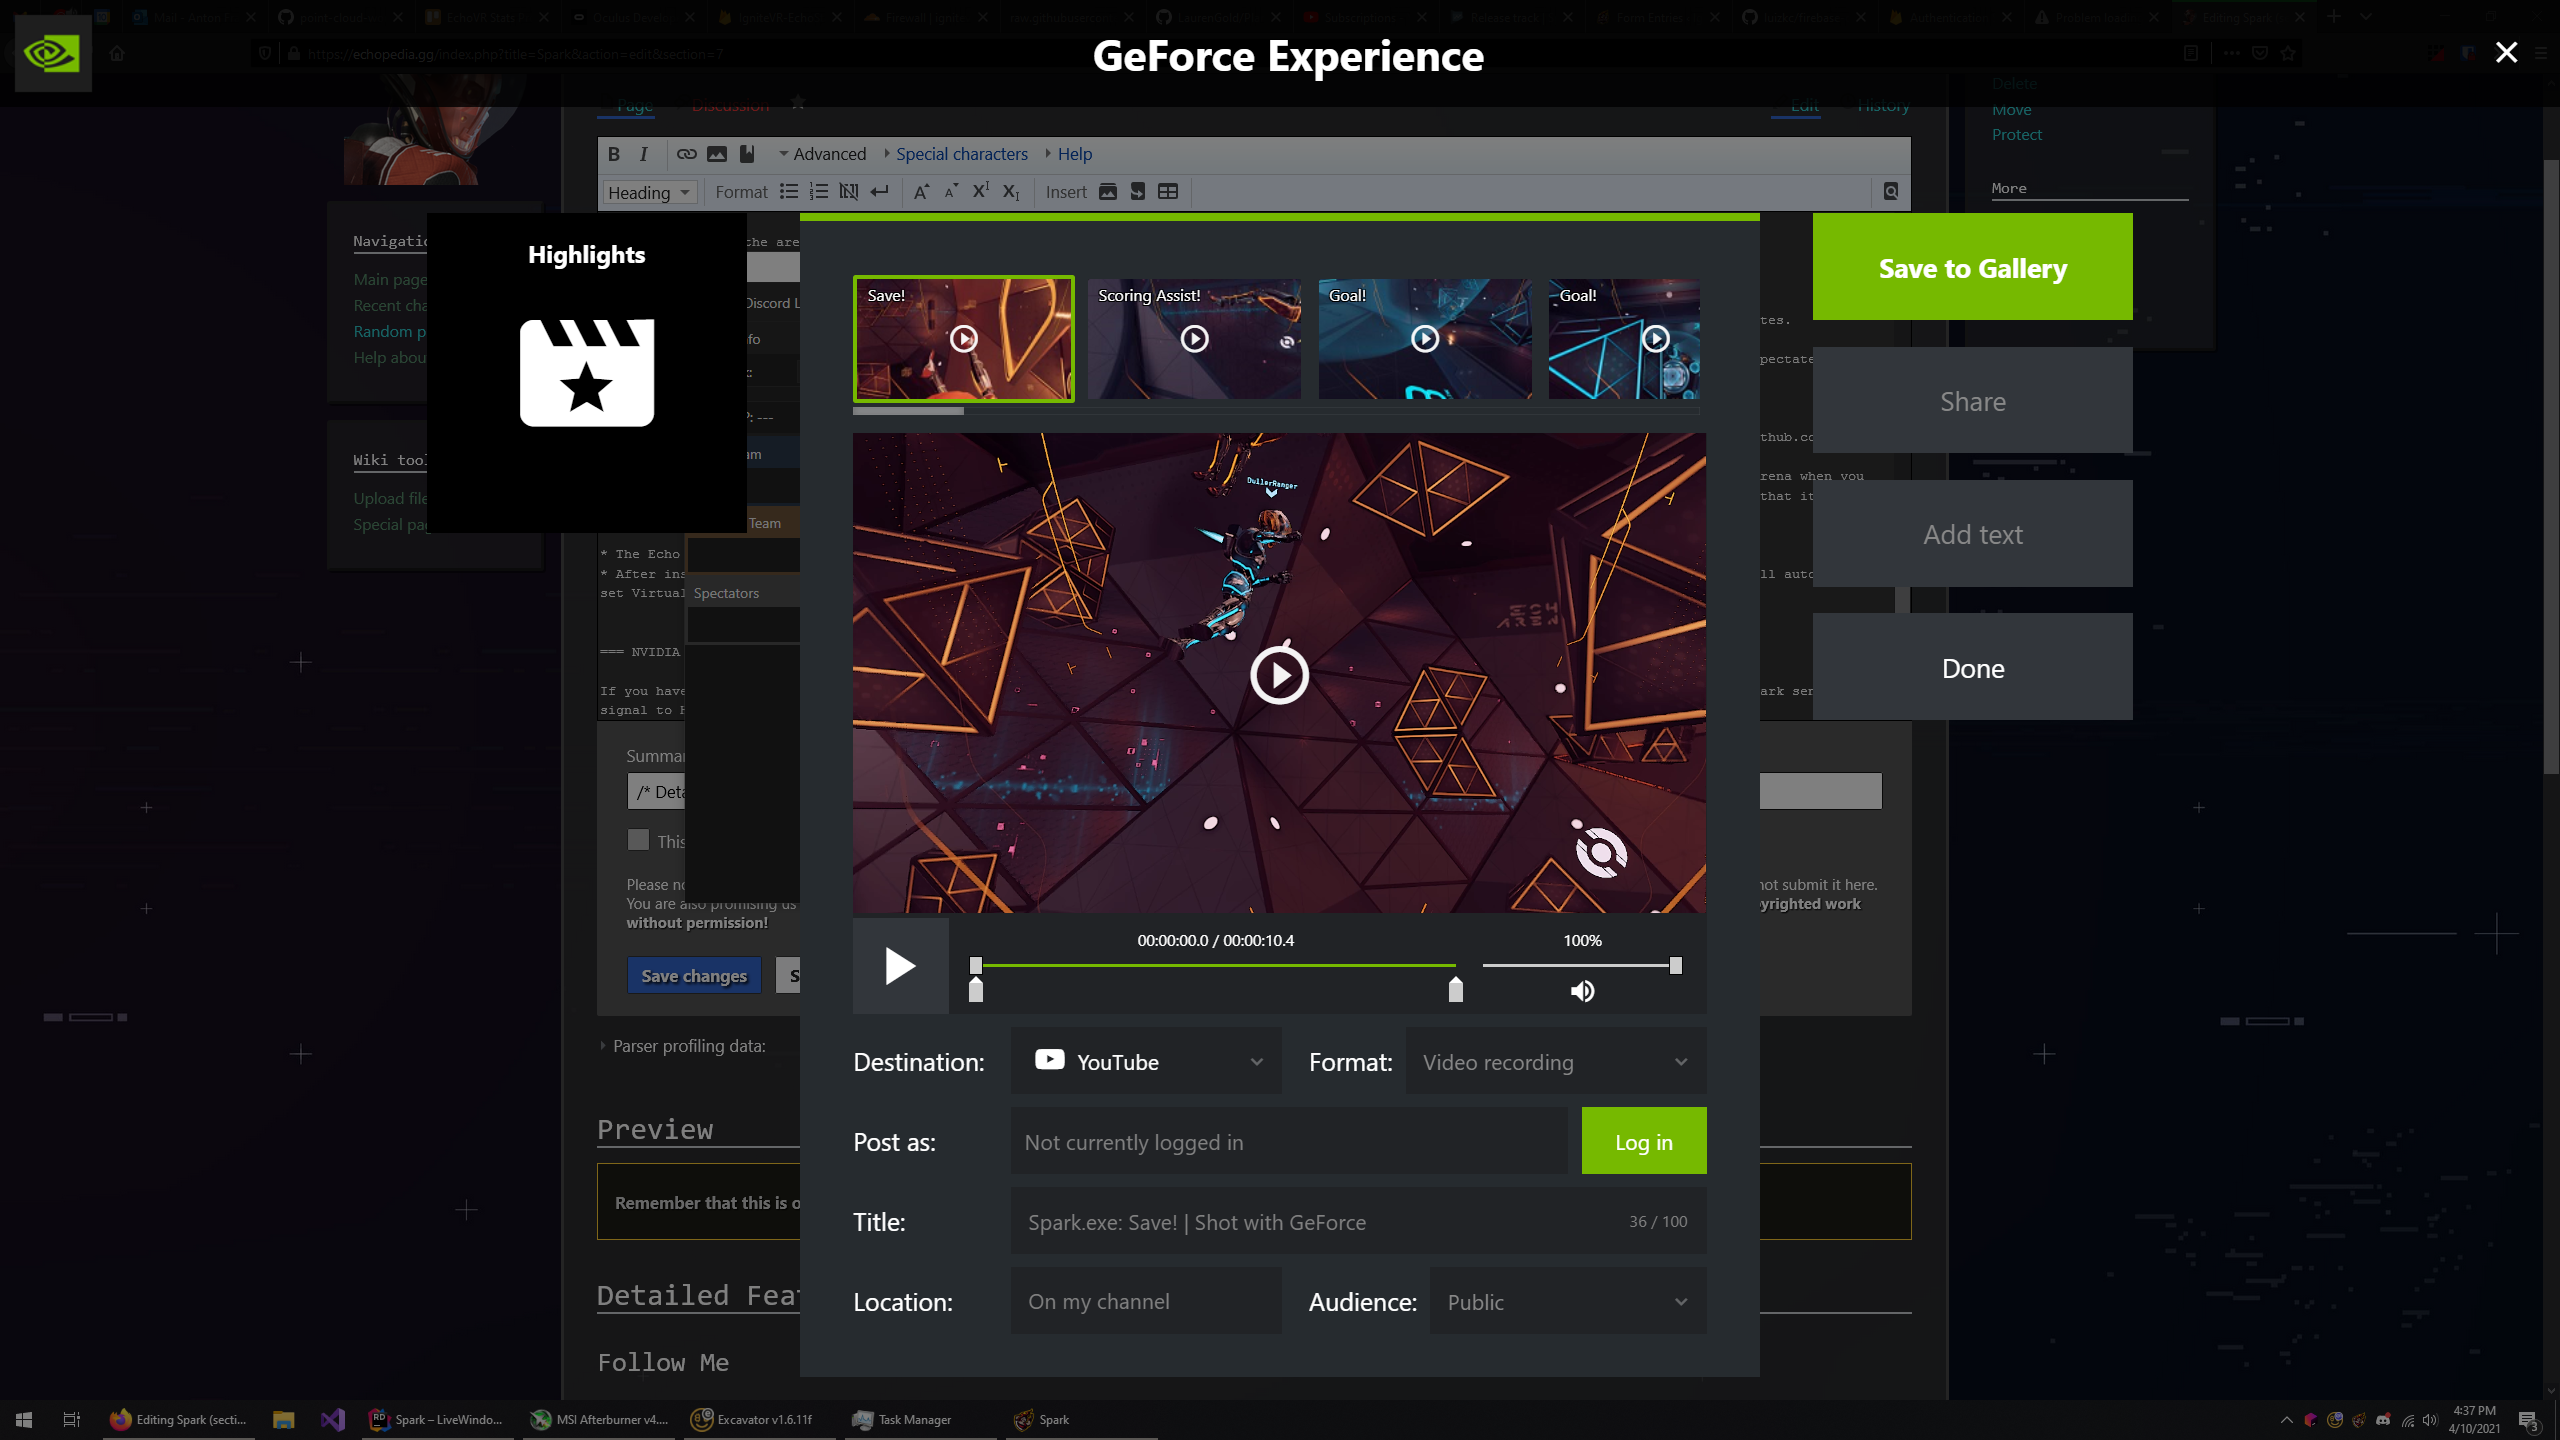
If you have a PC with an NVIDIA graphics card, you can use Spark to automatically activate a feature like ShadowPlay called NVIDIA Highlights. Spark sends a signal to Highlights to save a clip when certain events happen, like goals or saves. Clips are automatically saved to a temporary directory, but you can then go through all the clips that were saved by the system to save only the good ones permanently. Since the feature isn't provided by EchoVR directly, NVIDIA Highlights is only able to capture the main display, and not just the EchoVR window. To get NVIDIA Highlights working, make sure:
- You have GeForce Experience installed and set up.
- You have enabled the feature in Spark's settings.
- You have enabled Desktop Capture in the NVIDIA recording overlay under "Privacy control" at the very bottom of the settings menu in the overlay (ALT+Z)
To change the events that are recorded:
- Make sure Spark is open.
- Open the NVIDIA Overlay (ALT+Z)
- Click the settings wheel
- Click Highlights
- The event settings for Echo VR should be on that page
OBS Replay Buffer integration
Spark can automatically save the replay buffer feature within OBS. This allows you to automatically record clips on certain events even if you don't have an NVIDIA GPU. To set this feature up:
- Go to Spark's Settings->Clips tab->OBS tab
- Click the link to download the OBS plugin that allows remote control of OBS features by other programs. The link is also available here: https://github.com/Palakis/obs-websocket/releases
- Open OBS and set a password of your choice for the plugin (remember it obviously)
- Make sure you have the replay buffer setting enabled in OBS settings (Settings->Output->Enable Replay Buffer).
- In Spark, connect to OBS with the password you set just before.
- Start the replay buffer from Spark or OBS.
- Choose the events you want to record in the Spark settings under the OBS tab.
Uploading Stats
You must be signed into Spark with Discord (top left) to be able to use any of these features.
Upload personal public match stats
If you have the "Upload to IgniteVR Database" checkbox checked, Spark should automatically upload stats for your public matches. A new tab should appear on your player page on metrics.ignitevr.gg/stats, though this can take up to 30 minutes to appear. You can also visit https://metrics.ignitevr.gg/stats?player_name=[USERNAME]&db=personal directly.
Opt-in to detailed Ignite stats
Once you have played at least one game with Spark connected, you should be able to check the "Opt-in to detailed website stats" box in Spark. This will enable additional stats such as estimated height, handedness, and time of day played.
Upload Tablet Stats
The "Upload Tablet Stats" button shows you a window with all of the Oculus accounts that have played EchoVR on your computer. You can click to upload each profile once, or check the box to automatically upload them after every game. This data includes information such as full games played, w/l ratio, and the date of the first time you started playing EchoVR. You must have launched EchoVR logged into your desired Oculus account at least once for this feature to work.
Creating Matches in a Specific Region
Creating private matches in specific regions is only supported for PC because the Quest version of the game doesn't have full deeplinking support. However, there is a workaround:
- Start the private match using Spark using the region selector on your PC.
- Change the Quest IP field in Spark's settings to 127.0.0.1 to read data from your PC.
- Copy the spark:// link for the new private match.
- Change the Quest IP setting in Spark to the Quest IP again.
- Restart Spark.
- Get into a lobby on your Quest and make sure Spark is connected to your Quest.
- Click the spark:// link you copied earlier to join the match on your Quest.


